Top 10 SIC Marking E6 Laser Marking Machines for Buyers

Choosing an industrial laser marker is not just a matter of comparing power ratings. Buyers also need to consider the part material, marking area, production speed, and available floor space. This guide introduces ten SIC Marking E6 laser marking machines and the practical questions worth asking before requesting a quotation. The right setup depends on the job.

A clear, durable mark can support product identification, quality checks, and consistent production records. Yet results depend on the material, surface finish, marking content, and process settings. Ask for a sample test using parts similar to yours. Check how easily operators can prepare jobs, adjust layouts, and repeat approved settings. Small details matter, such as cable routing, fixture access, and whether the workstation fits beside existing equipment. They can affect daily use more than a brochure suggests.

The sic marking e6 range should be assessed against real production needs, not assumed to suit every application. Compare machine configurations, compatible accessories, service availability, and installation requirements with the supplier. Request written confirmation of specifications and support terms, then review them with your engineering or production team. A demonstration is useful. It may still leave questions about long-term maintenance or unusual parts, so record those uncertainties before buying. The following top-ten overview is intended as a starting point for informed evaluation, not a substitute for application testing and a site-specific assessment.
Top 10 SIC Marking E6 Laser Marking Machines for Buyers

Understanding the SIC Marking E6 Laser Marking Machine Range

Understanding an E6 laser marking machine range means comparing more than laser power. Buyers should check the marking area, enclosure, lens options, workpiece clearance, and control interface. These details affect whether a machine can mark a small metal component or a larger panel without awkward repositioning. Ask for sample marks on your actual material. A polished demo is useful, but production parts may behave differently.

Automation is also shaping purchasing decisions. The International Federation of Robotics’ World Robotics 2024 report recorded 541,302 industrial robot installations worldwide in 2023. That scale makes integration worth checking: confirm whether the marking system can exchange signals with production equipment and support repeatable part positioning. A catalogue can hide setup limits. I would not choose by headline speed alone.

Tips: Request a test with your material, mark size, and required cycle time. Inspect contrast under ordinary factory lighting, then review the mark after handling. Ask what routine lens cleaning involves. Small details matter.
Laser Marking Technology: Typical Wavelengths for Buyer Comparison

Typical nominal wavelengths for common laser marking sources. Wavelength is one factor to consider when comparing systems; material compatibility and application requirements also matter.

Values shown are commonly used nominal wavelengths: UV 355 nm, fiber 1,064 nm, and CO₂ 10,600 nm. Actual specifications vary by laser model. The horizontal axis uses a logarithmic scale.

Key Specifications and Features Buyers Should Compare

When comparing E6 laser marking machines, start with the material and the mark you need. A dark serial number on anodized aluminum requires different settings from a fine code on stainless steel. Check laser type, rated power, pulse control, and usable marking area. These affect contrast, edge sharpness, and cycle time. More power is not automatically better.

Look closely at the working field and focusing method. A larger lens can cover bigger parts, but may reduce detail on small text. Ask for sample marks using your own material, especially if parts have curved surfaces or coatings. Review software support, file formats, and how easily operators can adjust layouts. A quick demo helps. So does a real test.

Also compare enclosure design, interlocks, extraction options, and maintenance access. These details matter during everyday production, not just in a specification sheet. Confirm available training, spare-part access, and service response expectations. Request the full duty-cycle conditions behind any stated speed; a short demonstration may not reflect a full shift. One comparison can still mislead: polished samples hide setup issues. Check repeatability across several parts, and note whether focus, fixtures, or settings need frequent adjustment.

Top 10 SIC Marking E6 Laser Marking Machines for Buyers - Key Specifications and Features Buyers Should Compare

Exact specifications depend on the machine configuration. Use this comparison checklist to evaluate offered systems and confirm all figures against the supplier’s current datasheet and application test.

# Specification or feature What buyers should compare Why it matters
1 Laser source and wavelength Confirm the laser type and wavelength for the quoted configuration. Fiber marking lasers commonly operate near 1064 nm; do not assume this value applies to every option. Wavelength affects how materials absorb the beam and therefore influences marking performance and suitability.
2 Rated laser power Compare the offered output power in watts, available power options, and the conditions under which the rating is specified. Power can affect marking speed and process capability, but it does not by itself guarantee a particular result.
3 Marking field and lens Request the available marking-field dimensions for each lens and confirm the usable field at the specified working distance. A larger field can accommodate larger parts, while lens choice can affect achievable spot size and marking detail.
4 Supported materials Ask for test results on the exact material, finish, coating, and part geometry. Typical fiber-laser applications include many metals, but results vary by material and process. Material composition and surface treatment can change mark contrast, quality, and cycle time.
5 Marking quality and resolution Compare sample marks for text, logos, 2D codes, and fine features using production parts and the intended marking field. A practical sample test reveals legibility and code readability more reliably than a headline specification alone.
6 Marking speed and cycle time Request measured cycle times for the buyer’s actual content, mark size, material, and required quality. Separate laser marking time from loading and handling time. Real production throughput depends on the complete process, not just the laser’s scan speed.
7 Part size and workholding Check the usable work area, fixture arrangement, loading access, and any options needed for cylindrical or irregular parts. Correct positioning and stable fixturing help maintain repeatable mark placement.
8 Software and data handling Confirm supported file formats, variable-data fields, code generation, user permissions, and connection methods required for the production line. Software capabilities determine how easily jobs, serial numbers, and production data can be managed.
9 Safety and installation Verify the laser classification and guarding for the supplied configuration, required interlocks, electrical supply, ventilation, and installation conditions. Safety provisions and site requirements should be reviewed before equipment is installed or operated.
10 Service, warranty, and operating cost Compare warranty coverage, service response, spare-parts availability, training, preventive-maintenance needs, and expected consumables. Support and lifecycle costs affect uptime and total cost of ownership.

Buyer note: Request a written configuration sheet and sample-marking evaluation before comparing quotations; specifications and included accessories may differ between offered machines.

Top 10 SIC Marking E6 Machines by Configuration and Capability

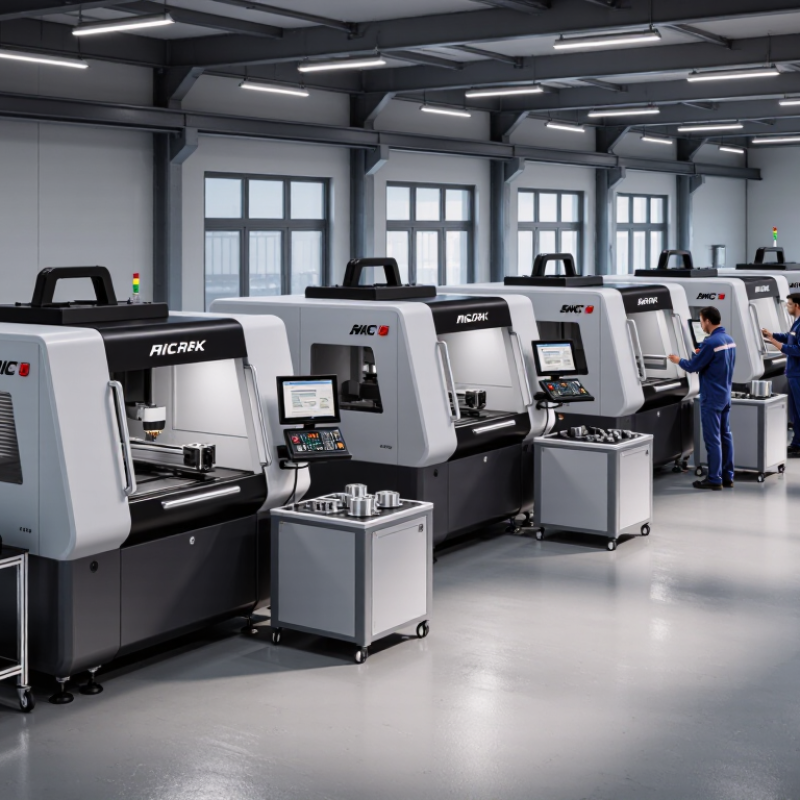
For buyers comparing the top ten E6 laser-marking configurations, the useful question is not simply which machine ranks first. It is which setup fits the part, marking area, and production pace. A compact enclosed fiber unit suits small metal components and bench work. An open-frame version allows easier access to larger parts, but needs a suitable safeguarded workspace. Fit matters.

Other configurations shift the strengths. A rotary-axis setup marks cylindrical parts; an XY table helps position repeated parts across a larger field. A conveyor integration supports moving production lines, while a high-power source may shorten cycle times on some materials. UV and CO2 options serve different material needs, so verify compatibility with actual samples. Do not assume every source handles every surface equally well.

For deeper comparison, consider lens size, enclosure, extraction, software, and maintenance access alongside marking speed. An integrated cell can reduce manual handling, though installation may take more planning. A flexible workstation may be easier to adapt, but could require more operator attention. Ask for a sample mark on the exact part, then inspect contrast, edge quality, and repeatability under realistic conditions. A tidy specification sheet can still mislead. Results can vary with finish, focus, and settings, so keep a record of the test conditions before choosing.

Matching E6 Laser Markers to Materials and Applications

Choosing an E6 laser marker starts with the material, not the machine’s headline speed. Bare stainless steel usually needs a different setup from anodized aluminum or coated parts. A focused test can reveal whether a mark is dark, crisp, and readable under workshop lighting. Check the smallest text and narrowest line your process requires. Tiny details matter.

For plastics, identify the exact resin and additives before selecting settings; similar-looking parts can react differently. Use sample pieces to check contrast, edge quality, and heat effects. On curved components, confirm that the marking area stays in focus across the surface. A rotary fixture may help, but it adds setup time and needs repeatable alignment. There is no universal preset. Record power, speed, frequency, and lens choice with each successful trial, then recheck them when batches or suppliers change. For traceability labels, prioritize consistent readability over maximum marking speed. A slightly slower cycle may produce fewer rejects, though production conditions can still shift results. Test the actual part.

How to Select the Right E6 Machine for Your Production Needs

Choosing an E6 laser marking machine starts with the parts, not the headline speed. List the materials, surface finishes, and mark dimensions you actually run. A small code on anodized aluminum behaves differently from a deep mark on stainless steel. Ask for sample tests using your own parts, including difficult finishes and curved surfaces. A clean demo plate is not enough.

Measure production needs at the workstation. Record parts per hour, changeover frequency, and the time operators spend positioning each item. Then compare the usable marking area, fixture options, software workflow, and connection to existing equipment. Check whether the machine can maintain consistent placement across a full shift. Fast is not always productive. A few seconds saved per mark may disappear during manual loading.

Inspect practical details before ordering. Confirm enclosure and safety features suit the installation, and ask how routine lens cleaning, maintenance, and operator training are handled. Request written information on expected service intervals and available support. If marks must remain readable after coating, abrasion, or heat, test that process too. I would not choose from a specification sheet alone; real parts often expose awkward setup issues that a polished trial misses. One missed detail matters. Keep samples and settings from each test, so your team can compare results rather than rely on memory.

+1 450 449 9133
Contact us sale@rhythmachine.com